Repelling Moles
3 minute read
Honking at the moles (to repel them)
Goal
My garden got terrorized by moles over the winter. My mole traps were not effective, so I had to come up with another solution.
Concept
It has been proven moles get repelled by sound. The typical sound of these repelling devices is in a frequency range of around 300-1000 Hz - example. These typical solar powered devices only produce a few watt of power, so I decided to take it up a notch … .
Burrying an audio speaker and tune the sound with an amplifier was an option, but that seemed a bit more costly and complex to automate (don’t want to produce non stop 24/7 noise) and get the necessary equipment in the garden. The typical horn / claxon of an automotive application is also in the same frequency range of 350Hz but produces much higher power levels. This is a cheap solution and only requires an on/off type of automation. Typical motorcycle claxons just have a vibrating disk actuated by 12V. As we know from hearing beeping watches under water, sound travels better through solids and liquids than it does through air.
Realization
Used components:
- Automotive horn, to give an idea about the sound level: it’s the horn of a scooter. You could also go for a double variant.
- Connectors
- Power supply providing a voltage between 9-16 V (capable of driving ~40 watt), I still had a 15V, 10A supply lying around so didn’t buy a new one (mine is link this).
- Smart switch to control the power supply and control the periodic honking at the moles Example Sonoff S26
- Plastic box to shield the horn from dirt. I’ve 3d-printed one, but any box can do.
- Power chord
Putting it together
An enclosure was 3d-printed so the claxon is protected and the steel disk remains free to vibrate (and hence produce sound), of course you can just use any other platic box. Note: just wrapping it in a plastic bag will not be sufficient: if something prevents oscillation of the steel disk, no sound will be produced anymore (ask me how I know …). In the 3d-printed enclosure, a small hinge was designed to keep the horn in place inside the box. Files for the enclosure can be found here: stl file, openscad file. I just can’t find the thingiverse source back where I modified this box from :(.
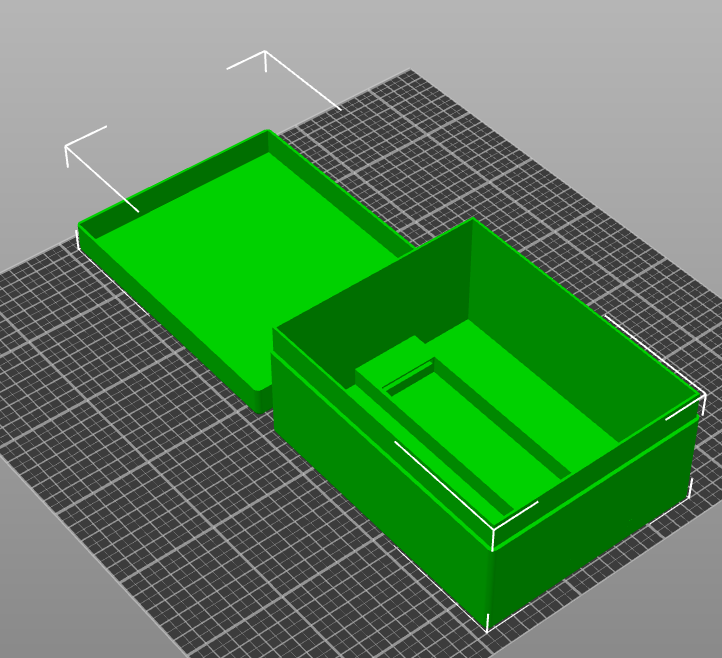
Enclosure
Wiring with matching connectors and power supply was done, et voila: ready to honk. Just don’t test it next to your ears … .
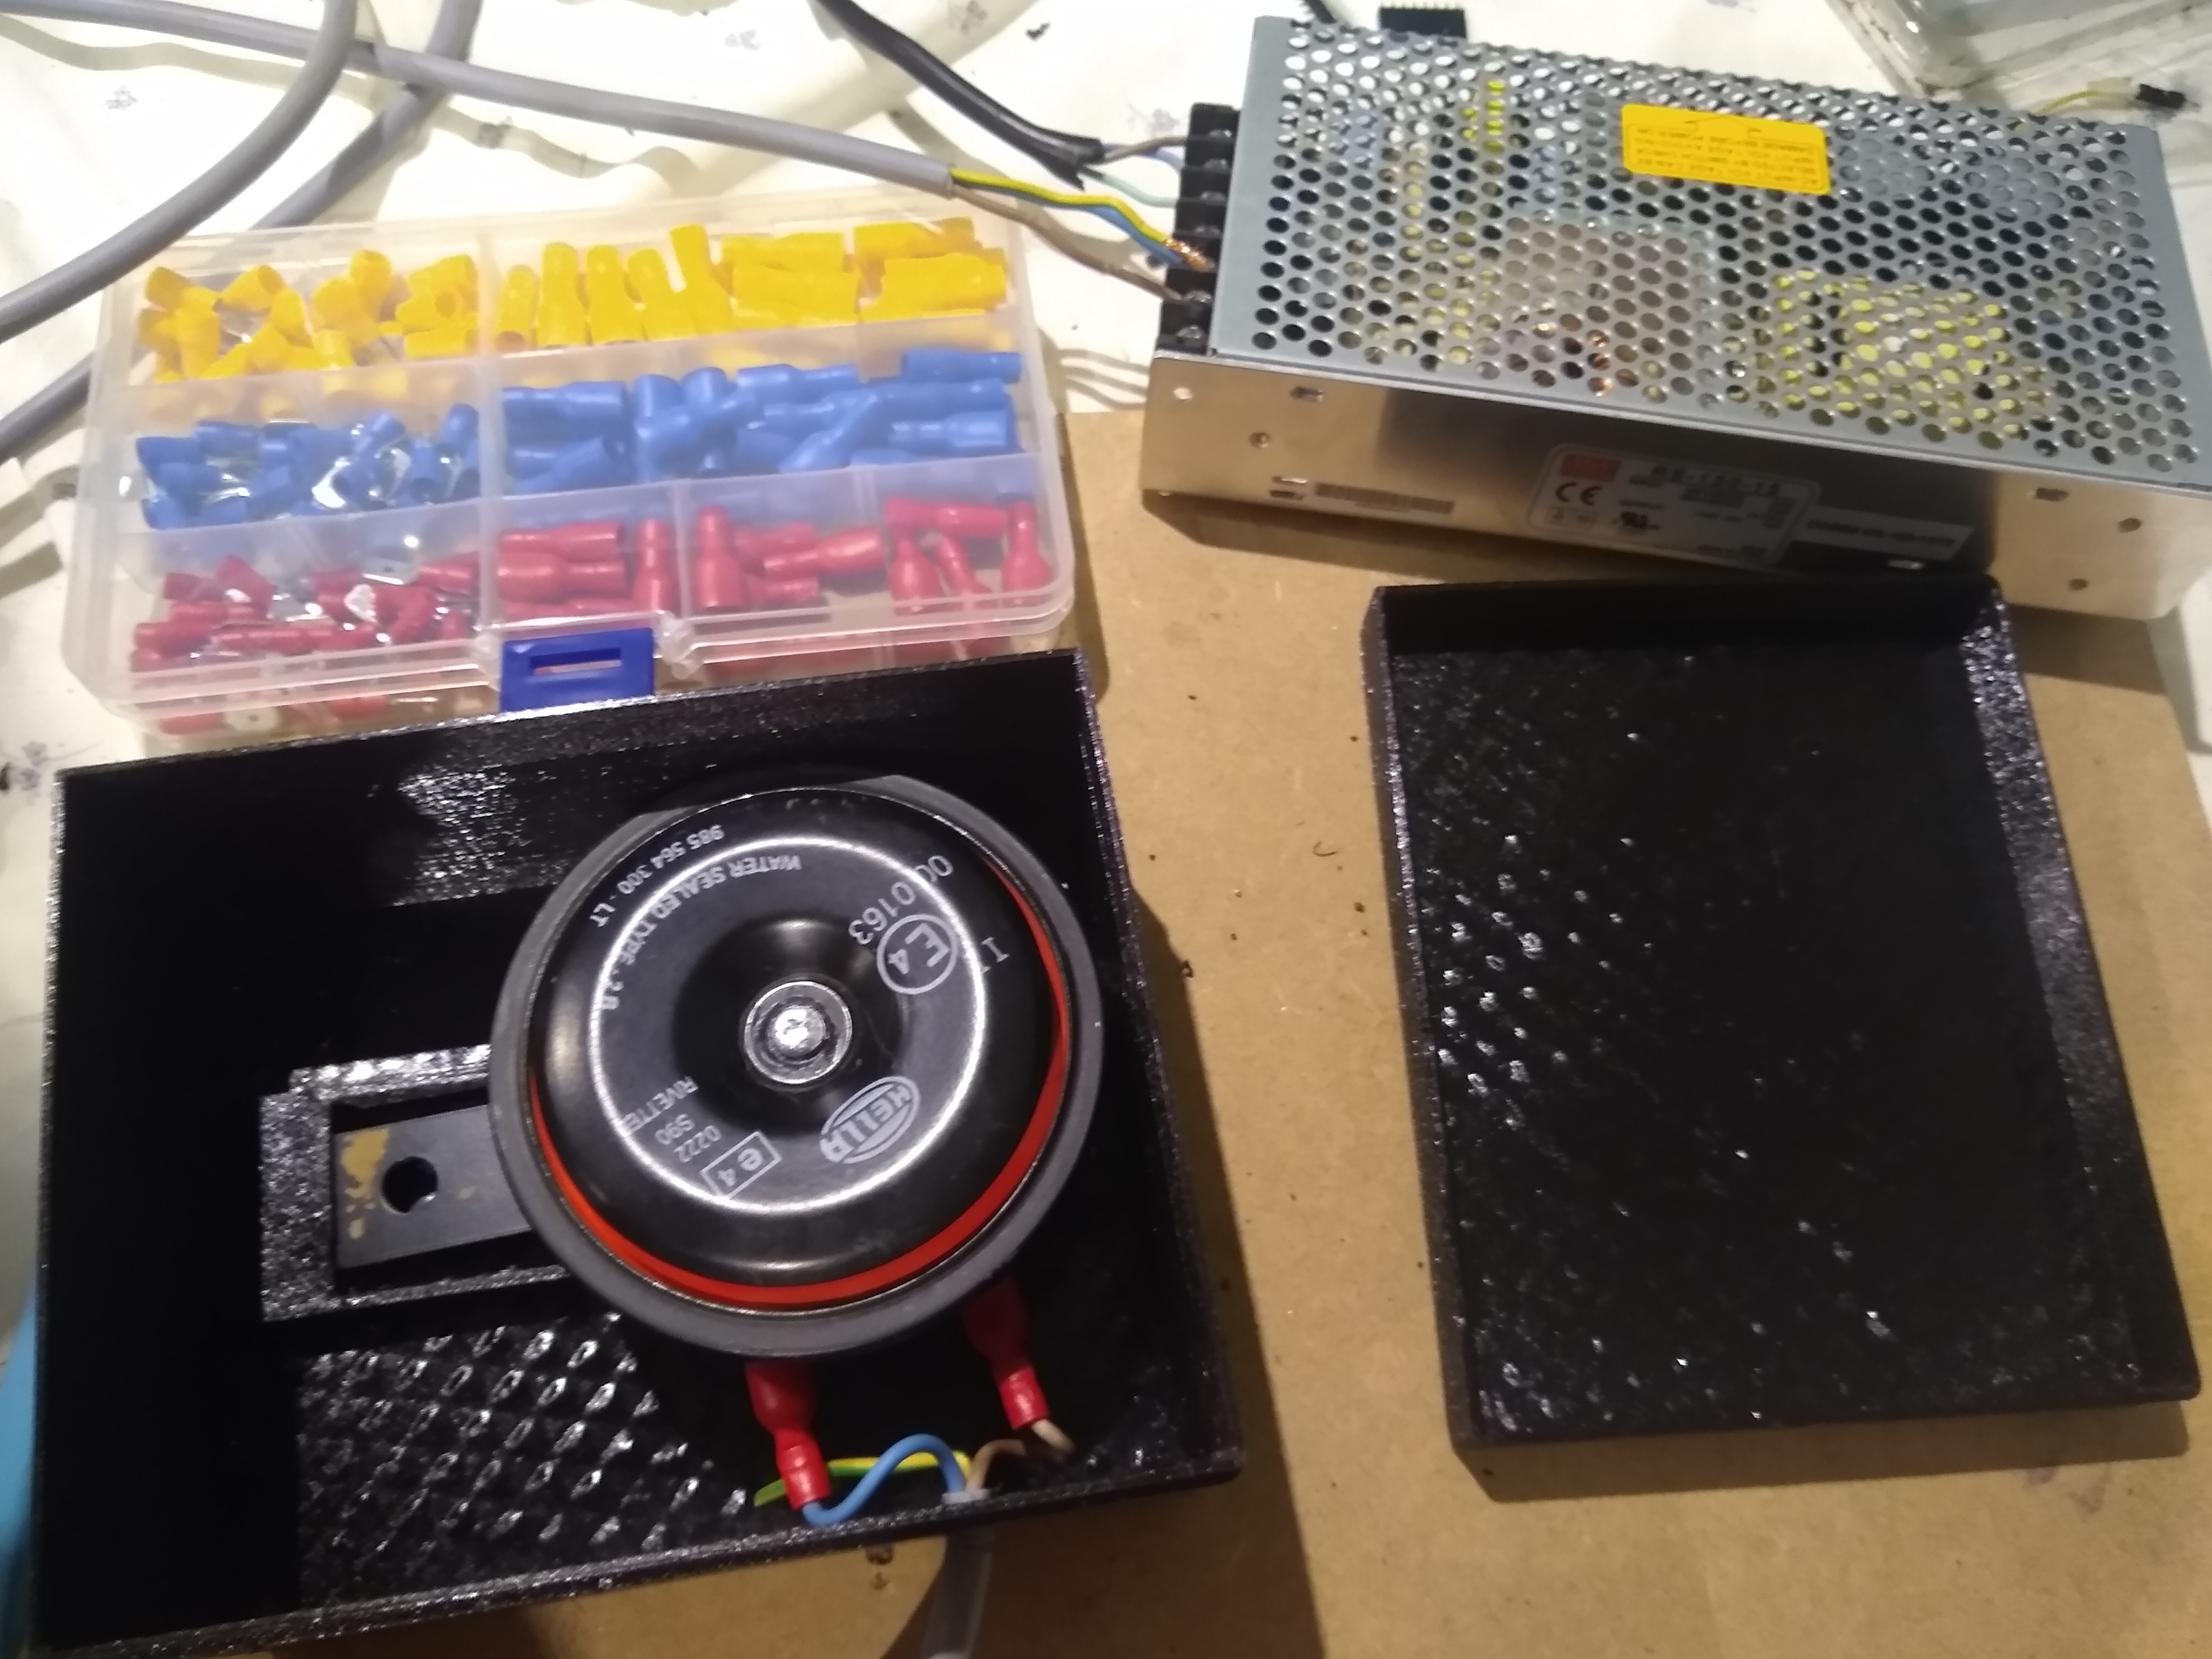
The different components (power supply, horn, platic enclosure, connectors)
Ground works
Installation was tried at different depths under the ground. I had to dig it in at a depth of ca. 80cm before the outside sound was judged low enough to not annoy my neighbours. Sound does travel better in solids than it does in air :). The wiring and connector was installed downwards so no debris will enter the enclosure by gravity.
Automation
The claxon cannot be turned on cotinuously. So a small automation was created to let it honk for ten seconds every ten minutes. Since all my other home automations are already using home assistant and the S26 switch flashed with tasmota. I didn’t detail this further.
Result
So far (two weeks after install), the moles didn’t create any new ground constructions in the greater area close to the claxon, I call this a success so far :).